Hi! My name is Piotr Mroz and I work in Evermotion. I would like to show You how I made one of our interior visualizations.
The scene that I am going to show comes from Archinteriors vol. 29 and it is available here: Archinteriors vol. 29.
We will start with the most difficult task ;) - setting proper units in 3ds max.
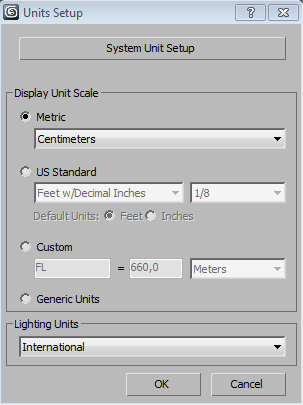
Setting units...
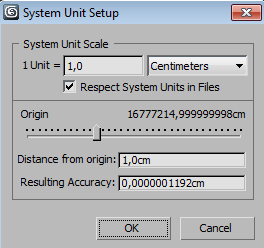
Setting units...
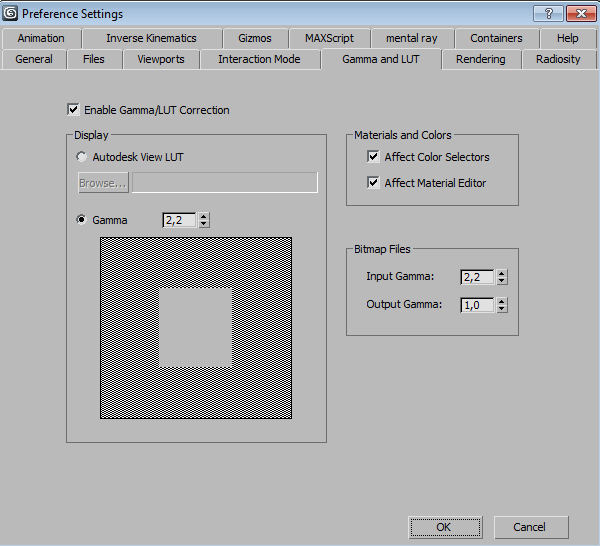 Open Gamma tab and change value to 2.2. This value ensures that we will work with linear workflow, so the renders will be physically precise and colors will be accurate.
Modeling
It is good to start modeling interior with a reference image. If You use such help, You will need to paint some perspective lines in it (using Photoshop or Gimp) so it will be easier to match perspective later in 3ds max. Here is a link to tutorial that will help You with this task: Making an interior scene by Kuba Dabrowski
It is good to start modeling interior with a reference image. If You use such help, You will need to paint some perspective lines in it (using Photoshop or Gimp) so it will be easier to match perspective later in 3ds max. Here is a link to tutorial that will help You with this task: Making an interior scene by Kuba Dabrowski
Click on image to enlarge
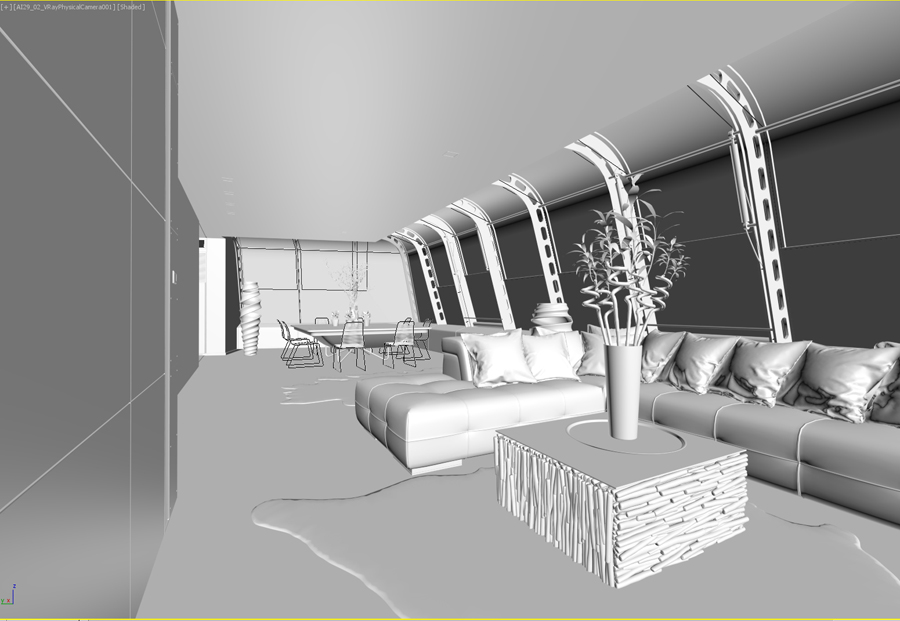
I start with simple interior, no materials at all, i just try to match real-world scale of things.
Click on image to enlarge
Lighting
Click on image to enlarge

When my furniture is on place it is time for setting up the lights in scene. I use all kind of lights, my choice depends of the scene I want to lighten up. In this case I used just a simple sky bitmap. I set it as my environment map. This map is my main light for a scene.
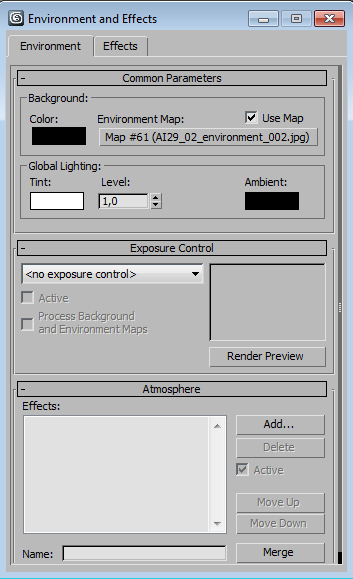
You can assign a map to environment map slot in 3ds max environment settings. Just press "8" on a keyboard.
Click on image to enlarge
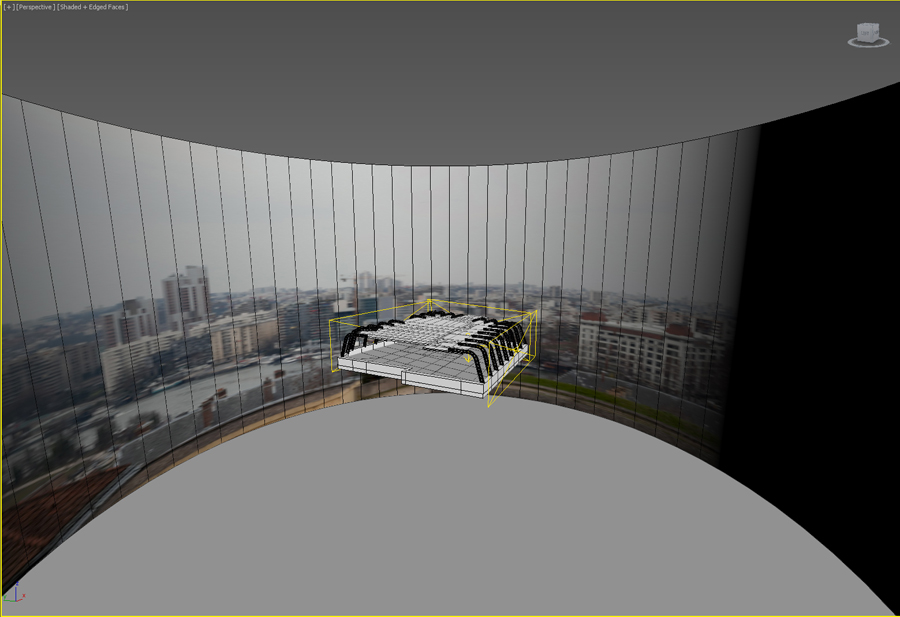
I used the second map as an exterior that You can see outside windows. It is a map downloaded from CG Textures, I modified it a bit in Photoshop - originally it was sunny day picture, I made it more cloudy.
Click on image to enlarge
I put this map on cylinder. I also created additional VRayLights with "Skyportal" option enabled. This way shadows are sharper and more precise. It extends rendering time but gives greater realism.
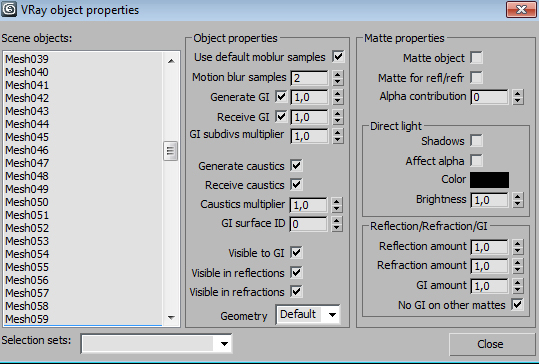
You have to remember to change "Alpha contribution" for cylinder to 0.0 in Your VRay object properties. This lets you to render alpha separately - everything behind the windows will be transparent. This way You can change the background later in Photoshop.
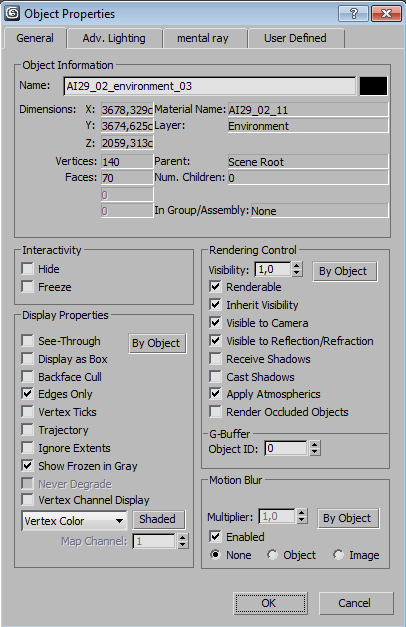
In cylinder object properties You also should turn off receive shadows and cast shadows options.
Click on image to enlarge
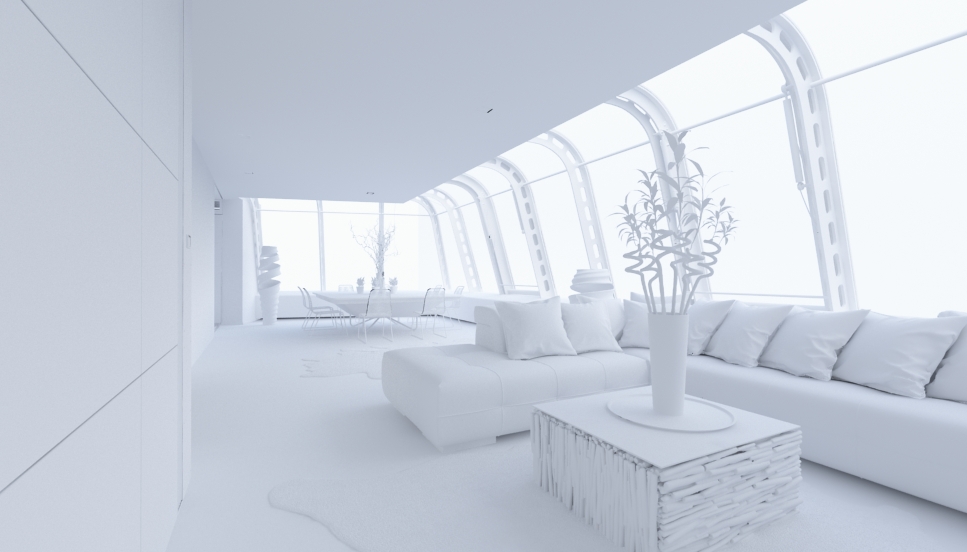
This is how the scene looks like with "skyportal" option on in VrayLights settings. Nice, clean, shadows.
Click on image to enlarge
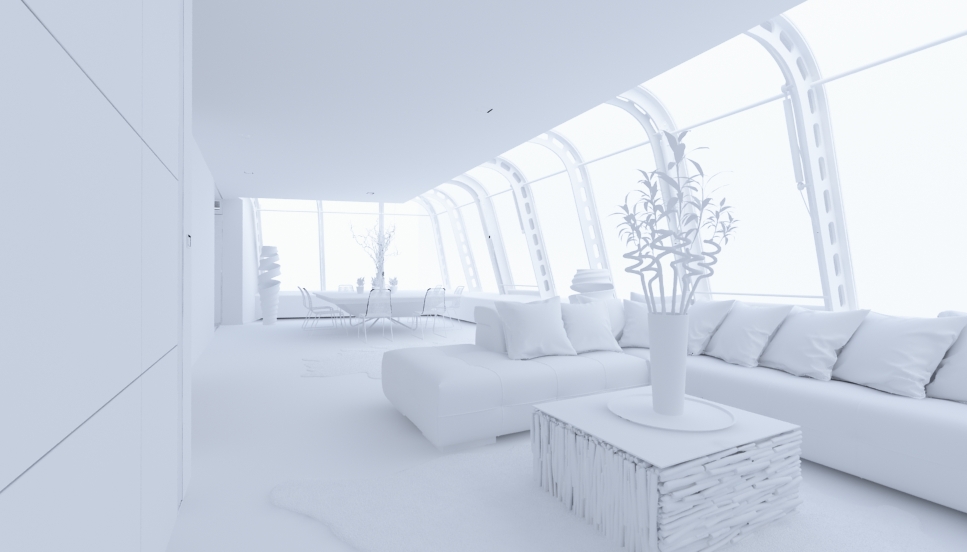
...and this is "skyportal" option off. Shadows are blurred.
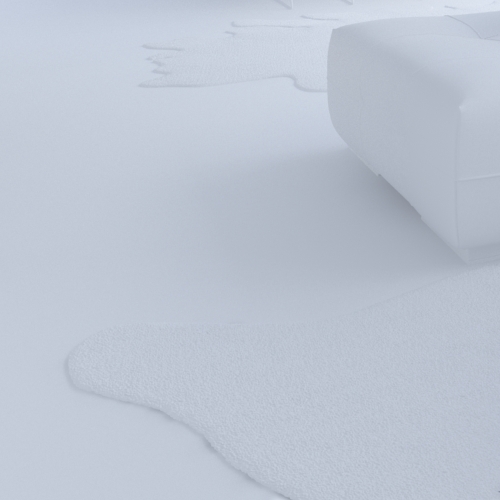
Skyportal option on (close-up)
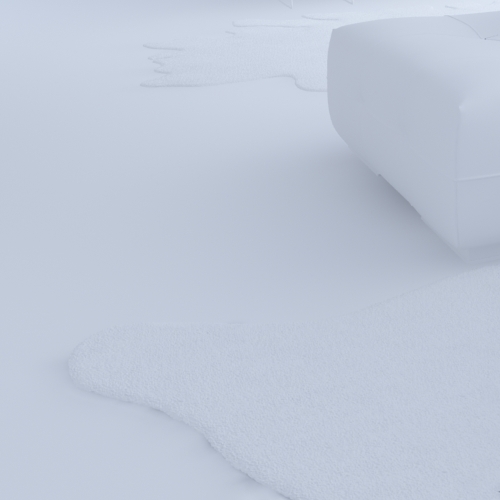
Skyportal option off (close-up)
Click on image to enlarge
Our scene without materials.
Materials
Click on image to enlarge
I haven't use any complicated materials in this scene. Some trick that I used to achieve "imperfection" of floor was to add simple procedural noise map to bump slot. It made floor look more natural, like it was not perfectly flat. The difference can be clearly seen if You compare reflection on a floor with noise map....
Click on image to enlarge
...and without it. Reflections on the floor are now flat. As You know, real things are never perfect, so adding imperfections as the one above makes scenes look more realistic. Good tip is to use maps in reflect slot and reflect glossiness or bump slots. They will add some natural looking roughness to the surface.
Click on image to enlarge
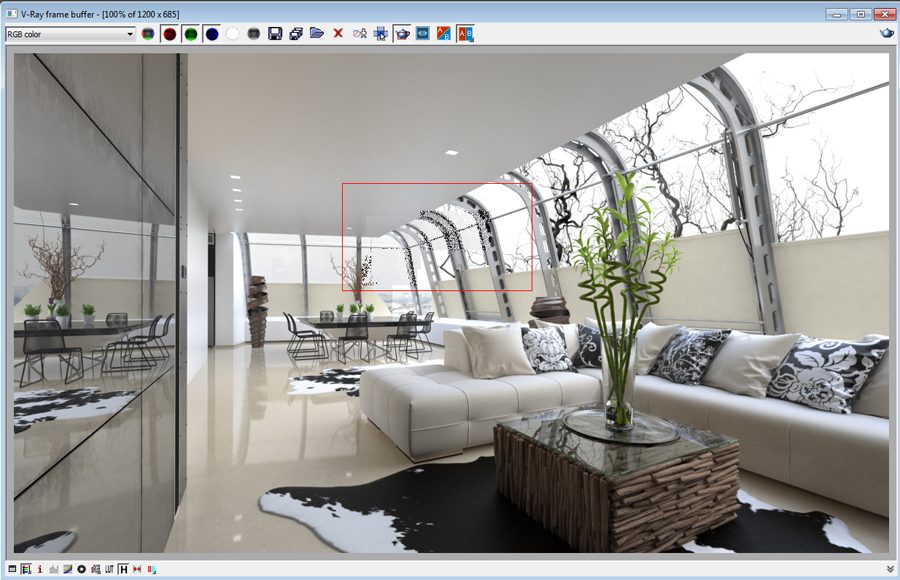
Another tip: when I am rendering I often use "regions". Thanks to VRay Frame Buffer History window I can save every render I made and load it anytime. It makes comparing the results faster.
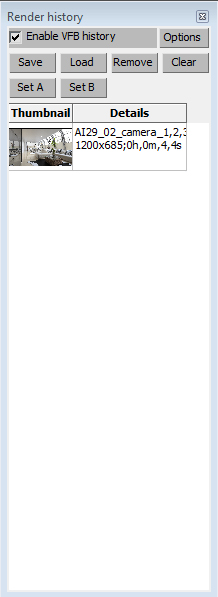
History window - saved renders
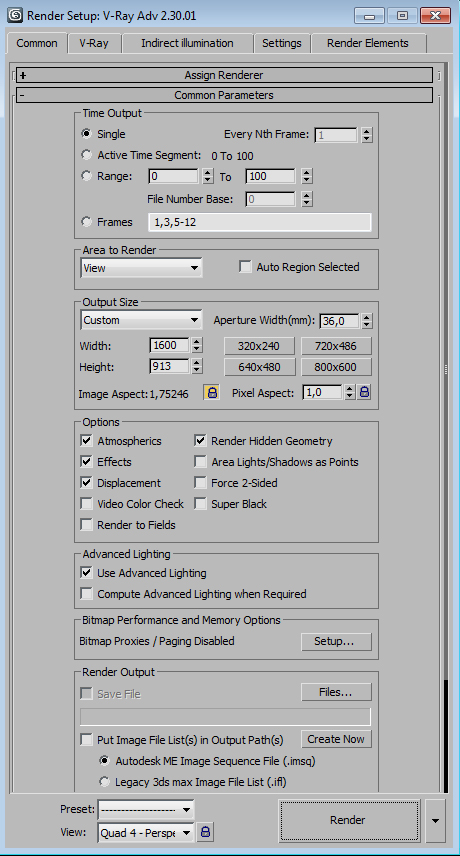
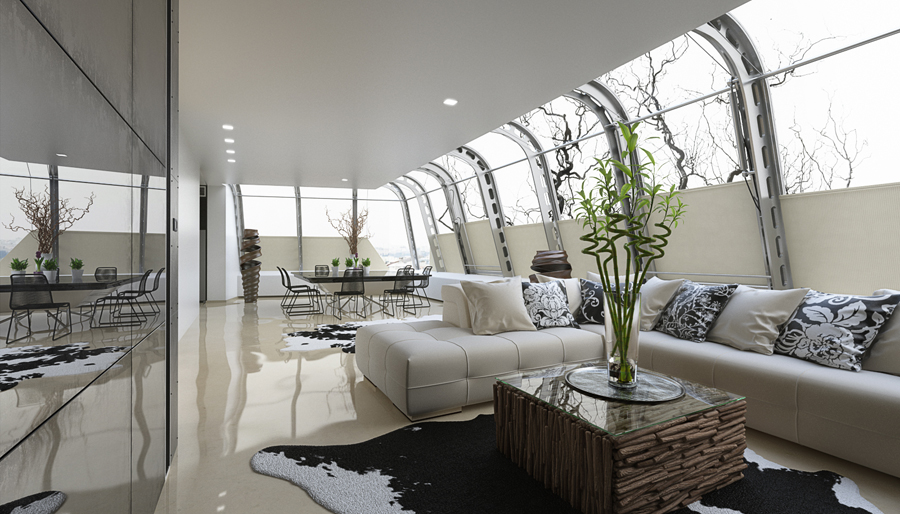
At the end I make my final render. I increase some quality settings, like GI. Those are my render settings (1)
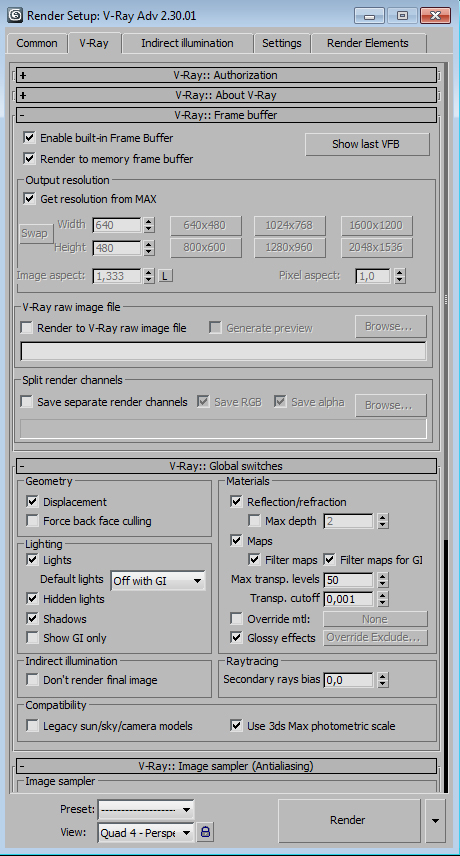
Render settings (2)
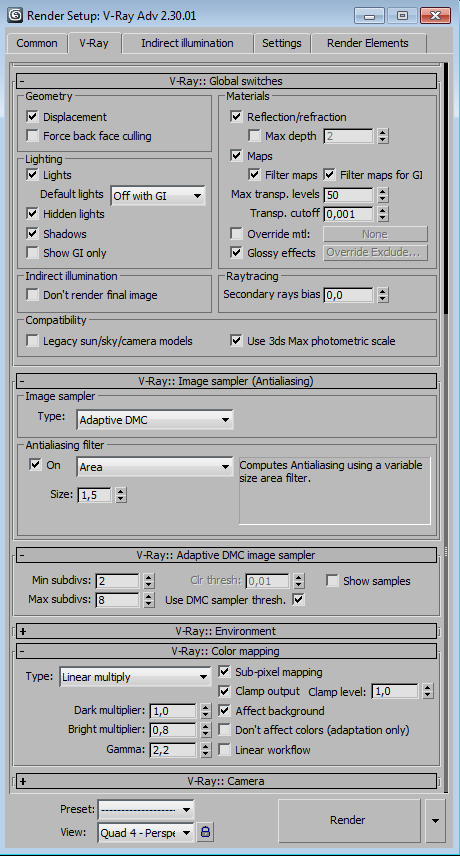
Render settings (3)
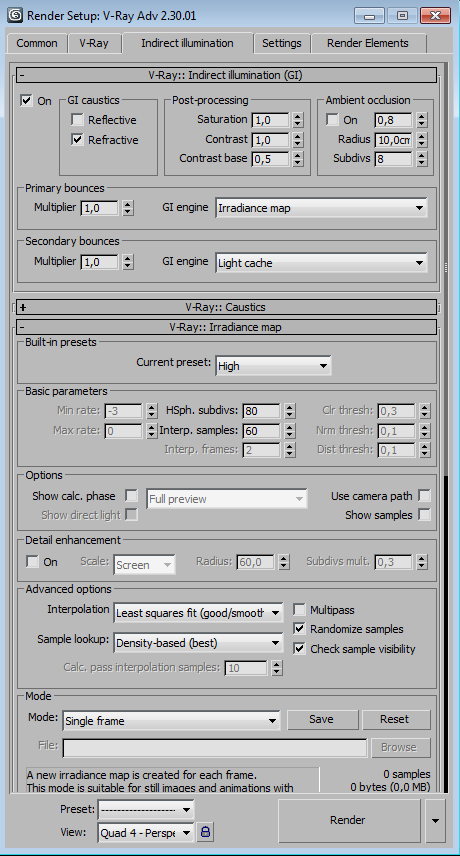
Render settings (4)
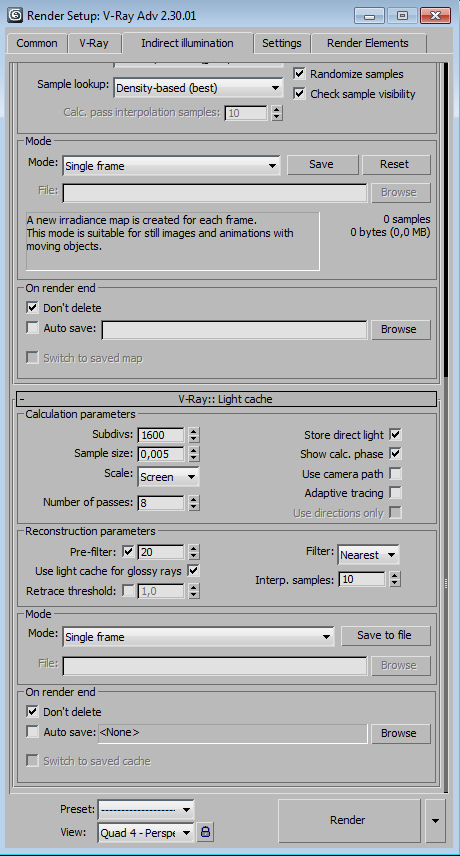
Render settings (5)
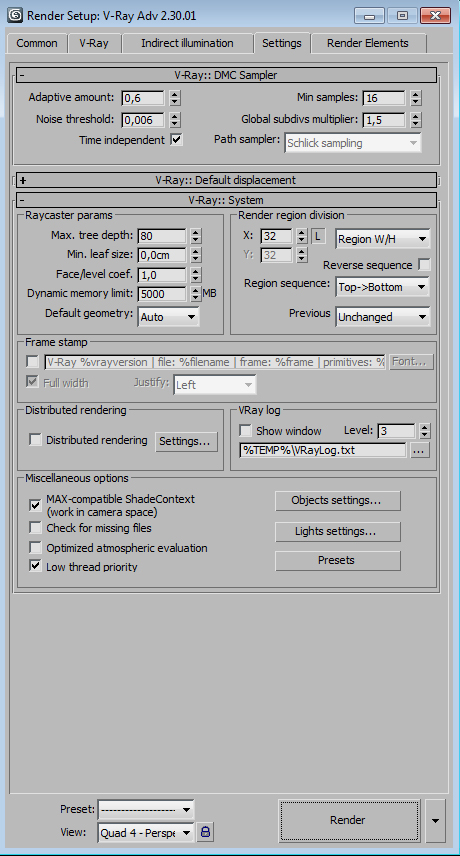
Render settings (6)
Click on image to enlarge
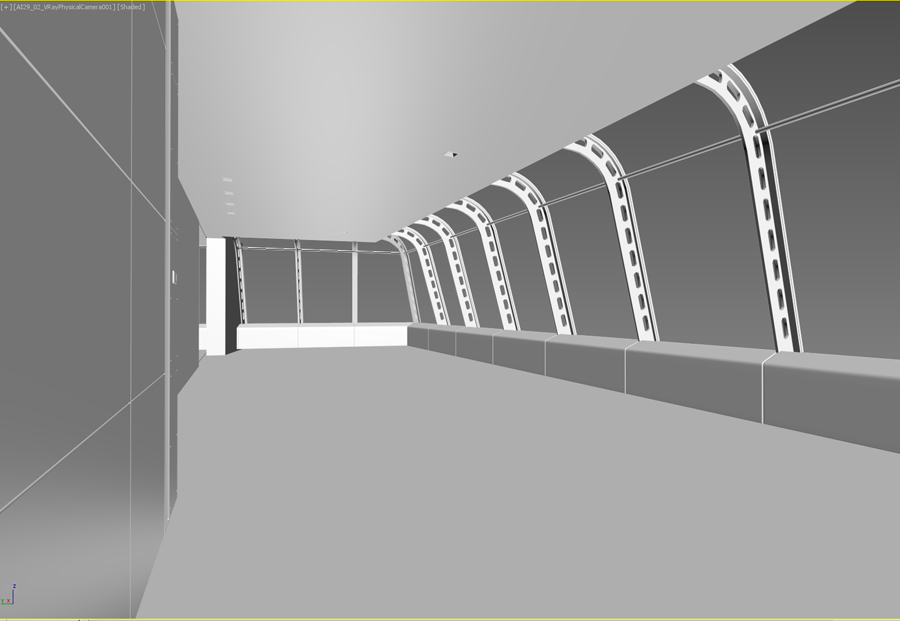
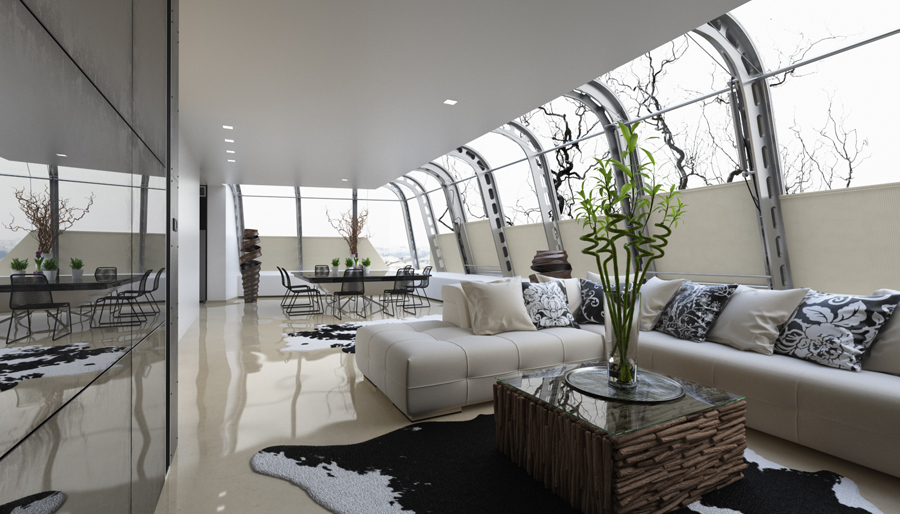
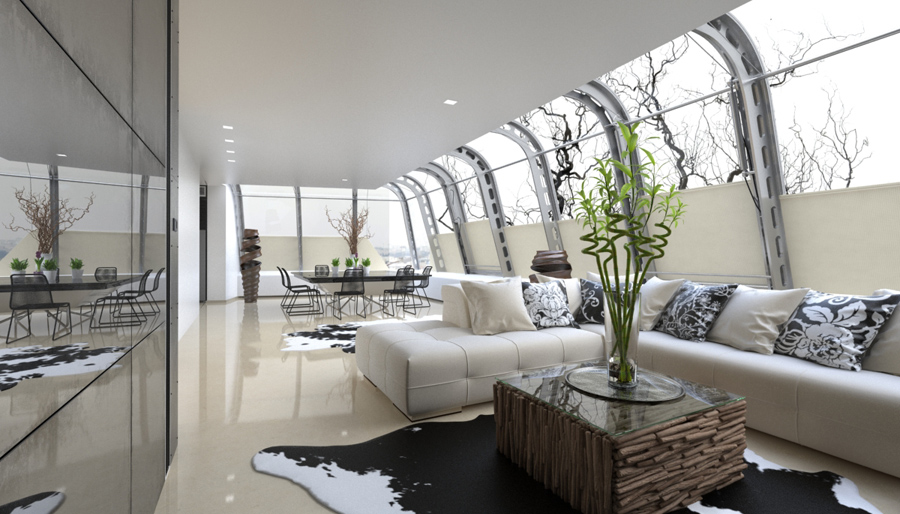
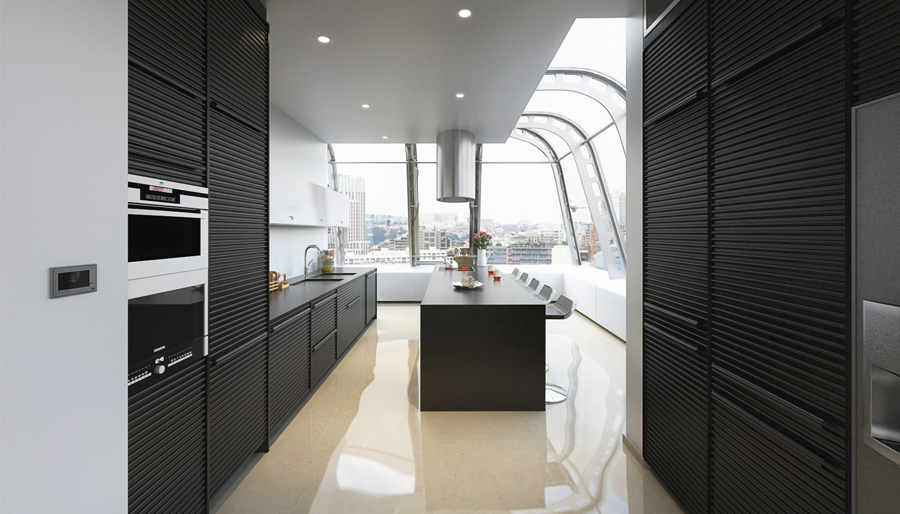
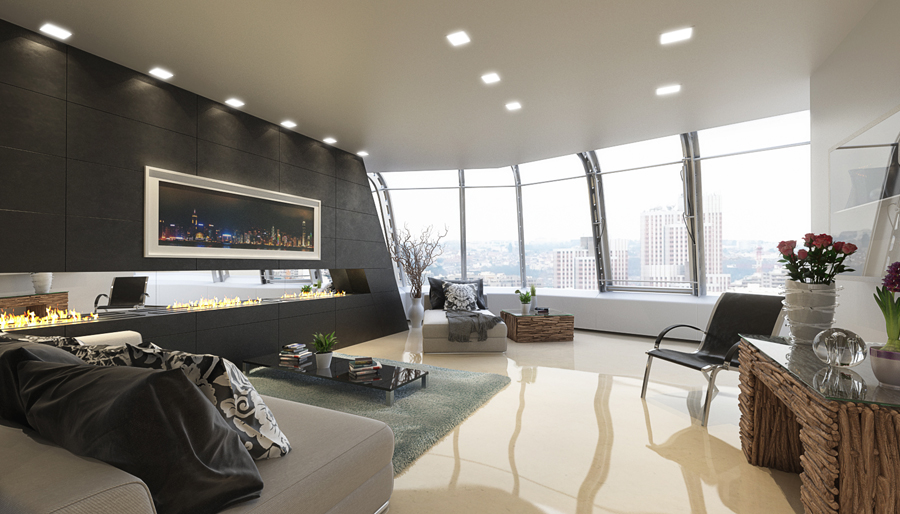
This scene was rendered from three different VrayPhysical cameras.
Click on image to enlarge
Final stage: After my final renders are finished I load them into Photoshop and make small corrections: making refractions and reflections more visible, sharpen the image a little. I also added subtle glow for windows. To achieve that I rendered such layers as VRay reflection and VRay refraction separately.
Click on image to enlarge
Final stage, camera 2
Click on image to enlarge
Final stage, camera 2 - wireframe
Click on image to enlarge
Final stage, camera 3
Click on image to enlarge
Final stage, camera 3 - wireframe
Piotr "Joker" Mróz
source: http://www.evermotion.org/




0 comments:
Post a Comment